3D Printing Troubleshooting Tips
Print is Difficult to Remove from Build Plate/Print Bed
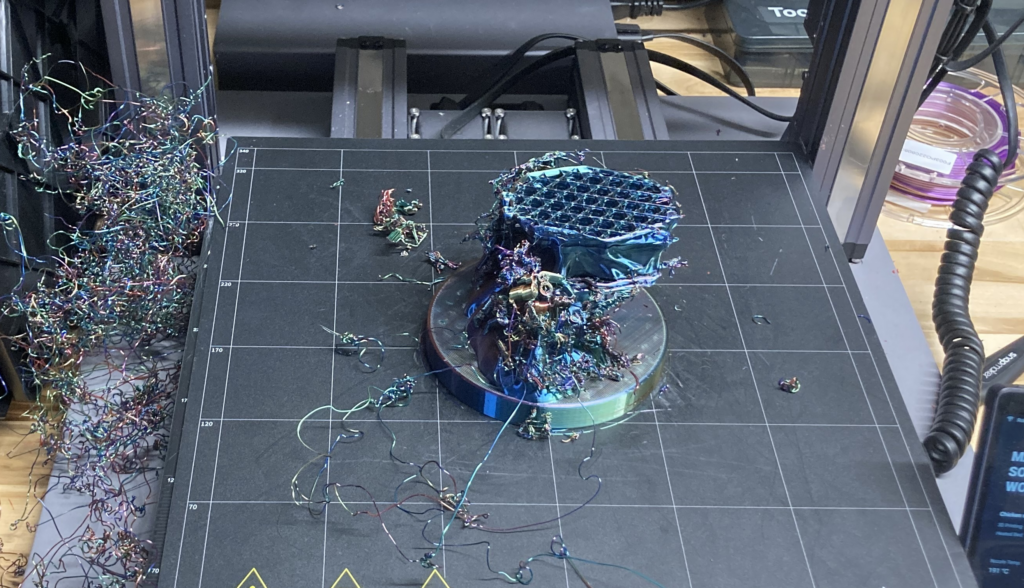
- Let the print bed cool down: If the print bed is still hot, the printed object will be more likely to stick to it. Wait for the print bed to cool down before attempting to remove the print.
- Use a spatula or scraper: Gently use a spatula or scraper to carefully pry the print away from the bed. Be careful not to damage the print bed or the print itself. ALWAYS scrape away from yourself and your hands.
- Adjust the print bed temperature: If the print bed temperature is too high, the print may stick too well. Try lowering the temperature slightly and see if that makes the print easier to remove.
- Don’t forget the print bed is flexible. You can flex it from multiple directions to release the print from the print bed.
- Apply painter’s tape to the print bed before printing. Prints will release from the tape more easily than from the print bed. You will need to recalibrate the printer after applying the tape. Don’t leave the tape on the print bed more than a week or two, it will become more difficult to remove.
The First Few Layers of Print Are Squished, or Don't Adhere Properly
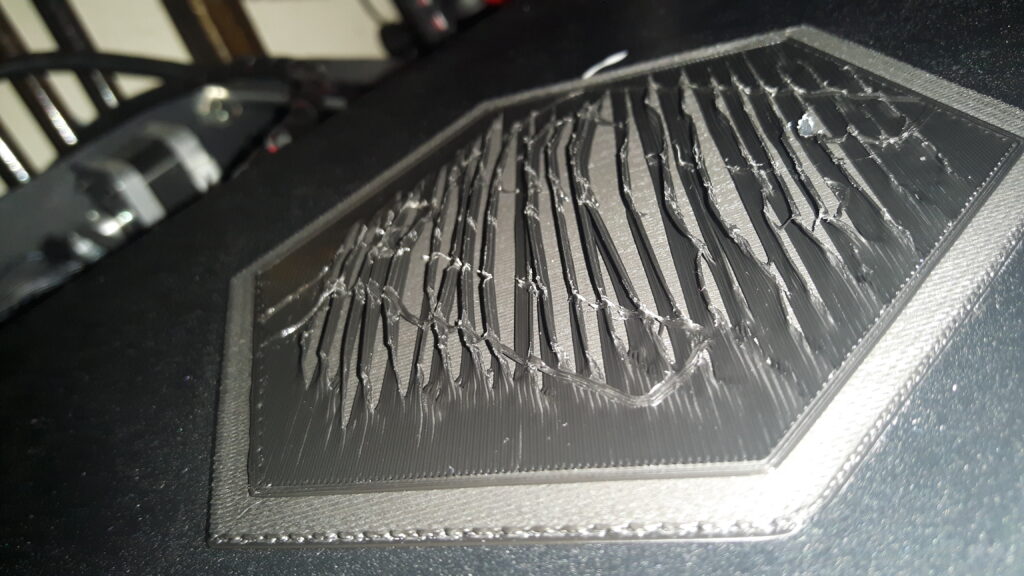
- Check the print bed level: If the print bed is not level, the print may not adhere properly to the bed. Complete the calibration process (from the touch screen on the Makerbot Sketch) occasionally to make sure the print bed is level or if you experience problems with the first few layers.
- Clean the print bed: If the print bed is dirty or greasy, the print may not stick to it properly. Clean the print bed thoroughly with isopropyl alcohol or another cleaning solution to remove any dirt or grease.
- Adjust the print bed temperature: If the print bed temperature is too low, the print may not stick to the bed properly. Try increasing the temperature slightly and see if that improves the adhesion.
- Adjust the print speed: If the print speed is too high, the printer may not be able to keep up, leading to failed prints. Try reducing the print speed to see if that helps.
- Adjust the extruder temperature: If the extruder temperature is too low, the printer may not be able to melt the filament properly, leading to failed prints. Try increasing the extruder temperature slightly and see if that helps.
- Check the filament: Make sure the filament is feeding properly into the printer. If it’s not, the print may fail. Check for any tangles or jams and clear them if necessary.
- Check the nozzle: If the nozzle is clogged or dirty, the printer may not be able to extrude the filament properly. Use a needle or small tool to clean the nozzle carefully.
Print is Warped on the Bottom
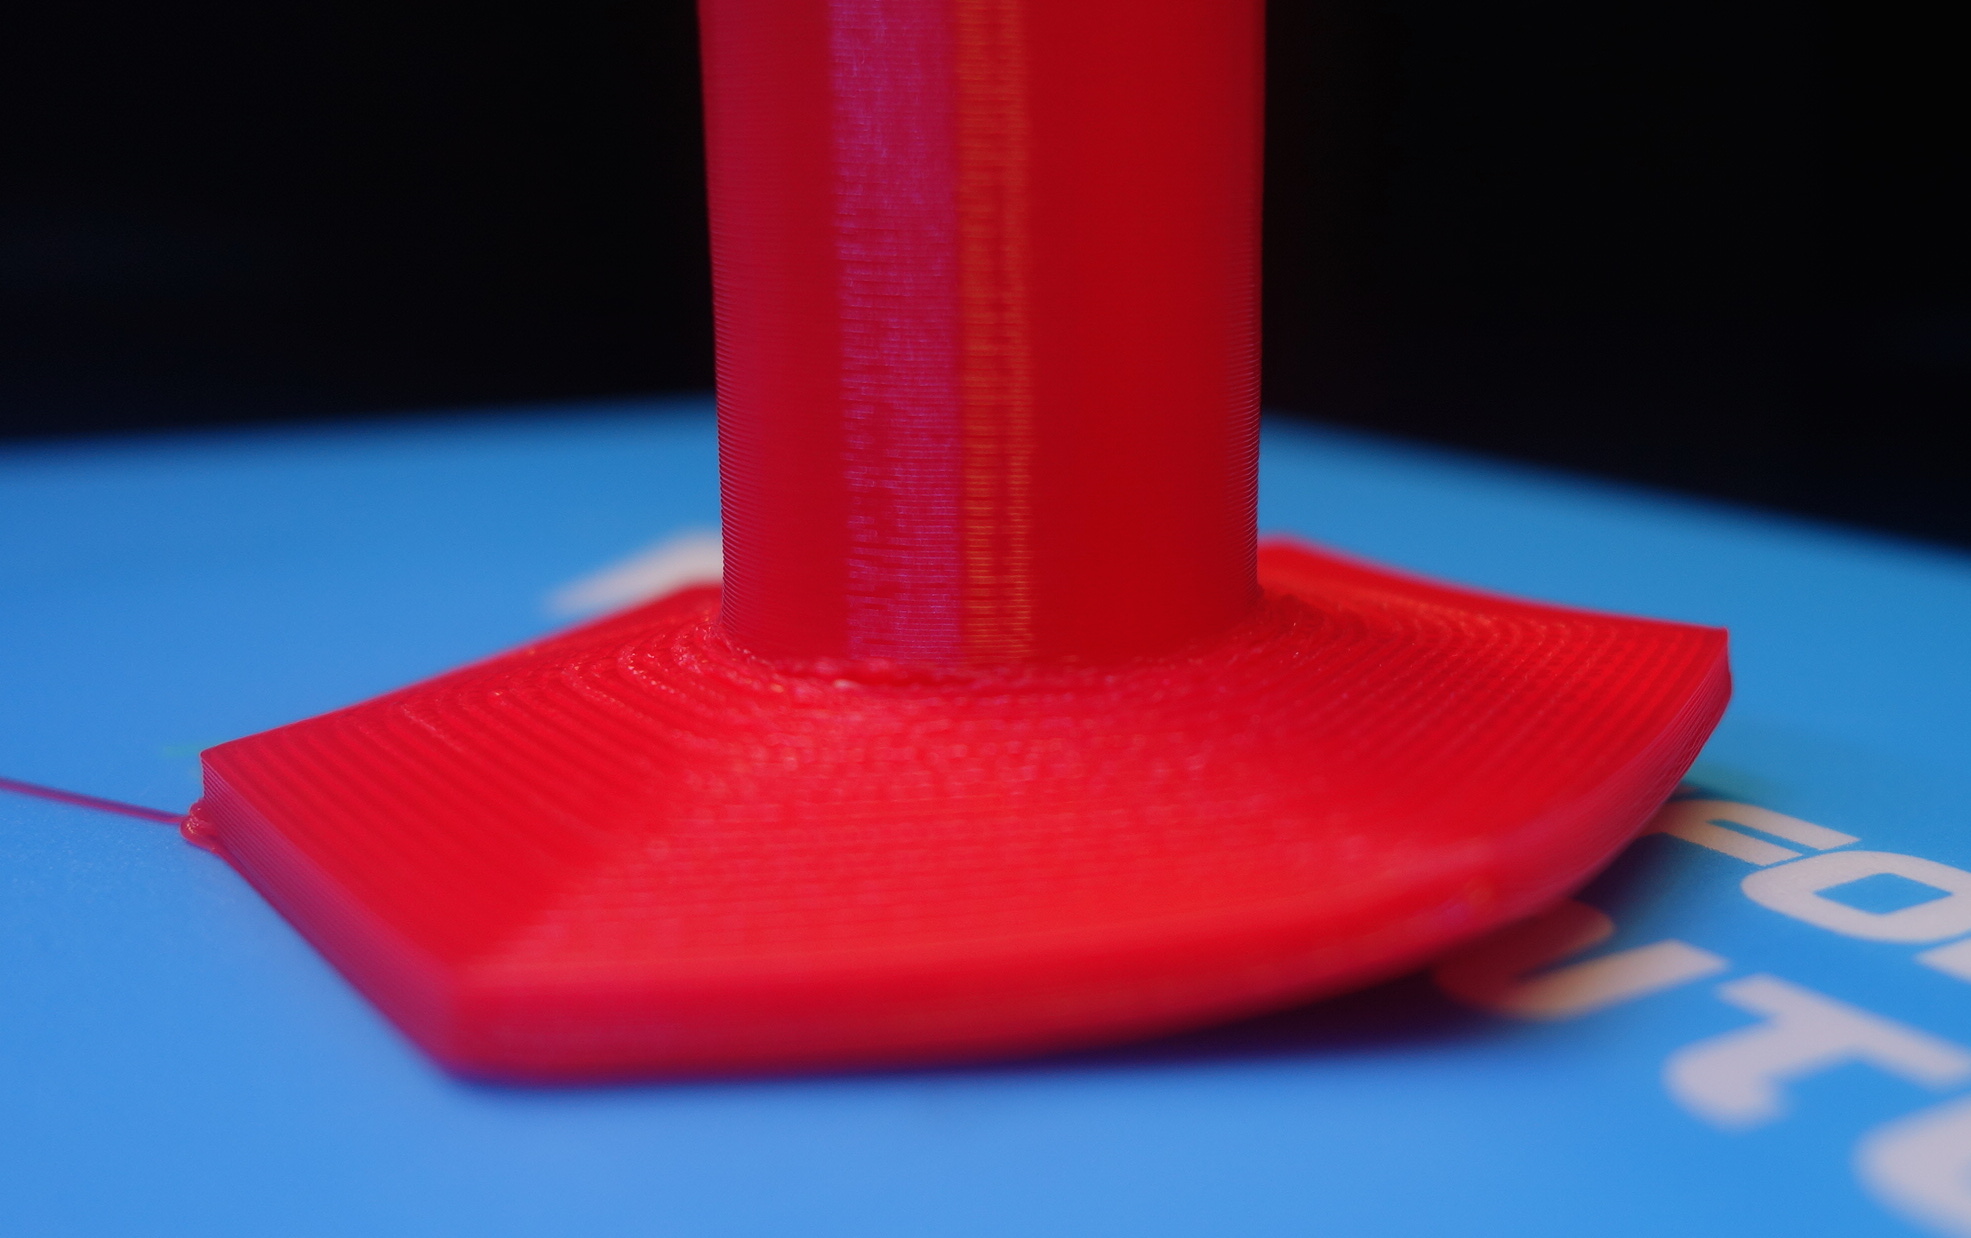
Heated Print Bed: Ensure that your 3D printer’s print bed is heated and properly calibrated. A heated bed helps the first layers of the print adhere well to the surface, reducing the chances of warping. Set the bed temperature according to the filament’s recommendations.
Bed Adhesion: Improve bed adhesion by using proper adhesion aids like a build surface with good grip, adhesive sprays, or painter’s tape. You can also use a raft or brim to increase the contact area with the print bed.
Calibrate the printer: Calibration ensures that the printer is at the optimal settings for proper print bed adhesion.
Decrease Cooling: Reduce or disable the cooling fan for the first few layers. Cooling the printed part too soon can cause uneven cooling and warping. Gradually increase the cooling as the print progresses, especially for the upper layers.
Increase Ambient Temperature: Keep the room temperature slightly elevated during printing. This helps maintain a more stable temperature around the printer, reducing the chances of rapid cooling and warping.
Reduce Print Speed: Slower print speeds allow the layers to cool more evenly, reducing internal stress and minimizing warping.
Modify Design: If possible, design your model with rounded corners and gradual transitions between different sections. Sharp corners and sudden changes in geometry can create stress points that lead to warping.
Use Brims or Raft: Adding a brim or raft structures can help anchor the model to the print bed and reduce warping, especially for parts with large overhangs.